After logging in with your registered account, you will be assigned the Reseller role. To create and manage sub-customers or sub-resellers in Simplify, navigate to the left menu and select Manage User.
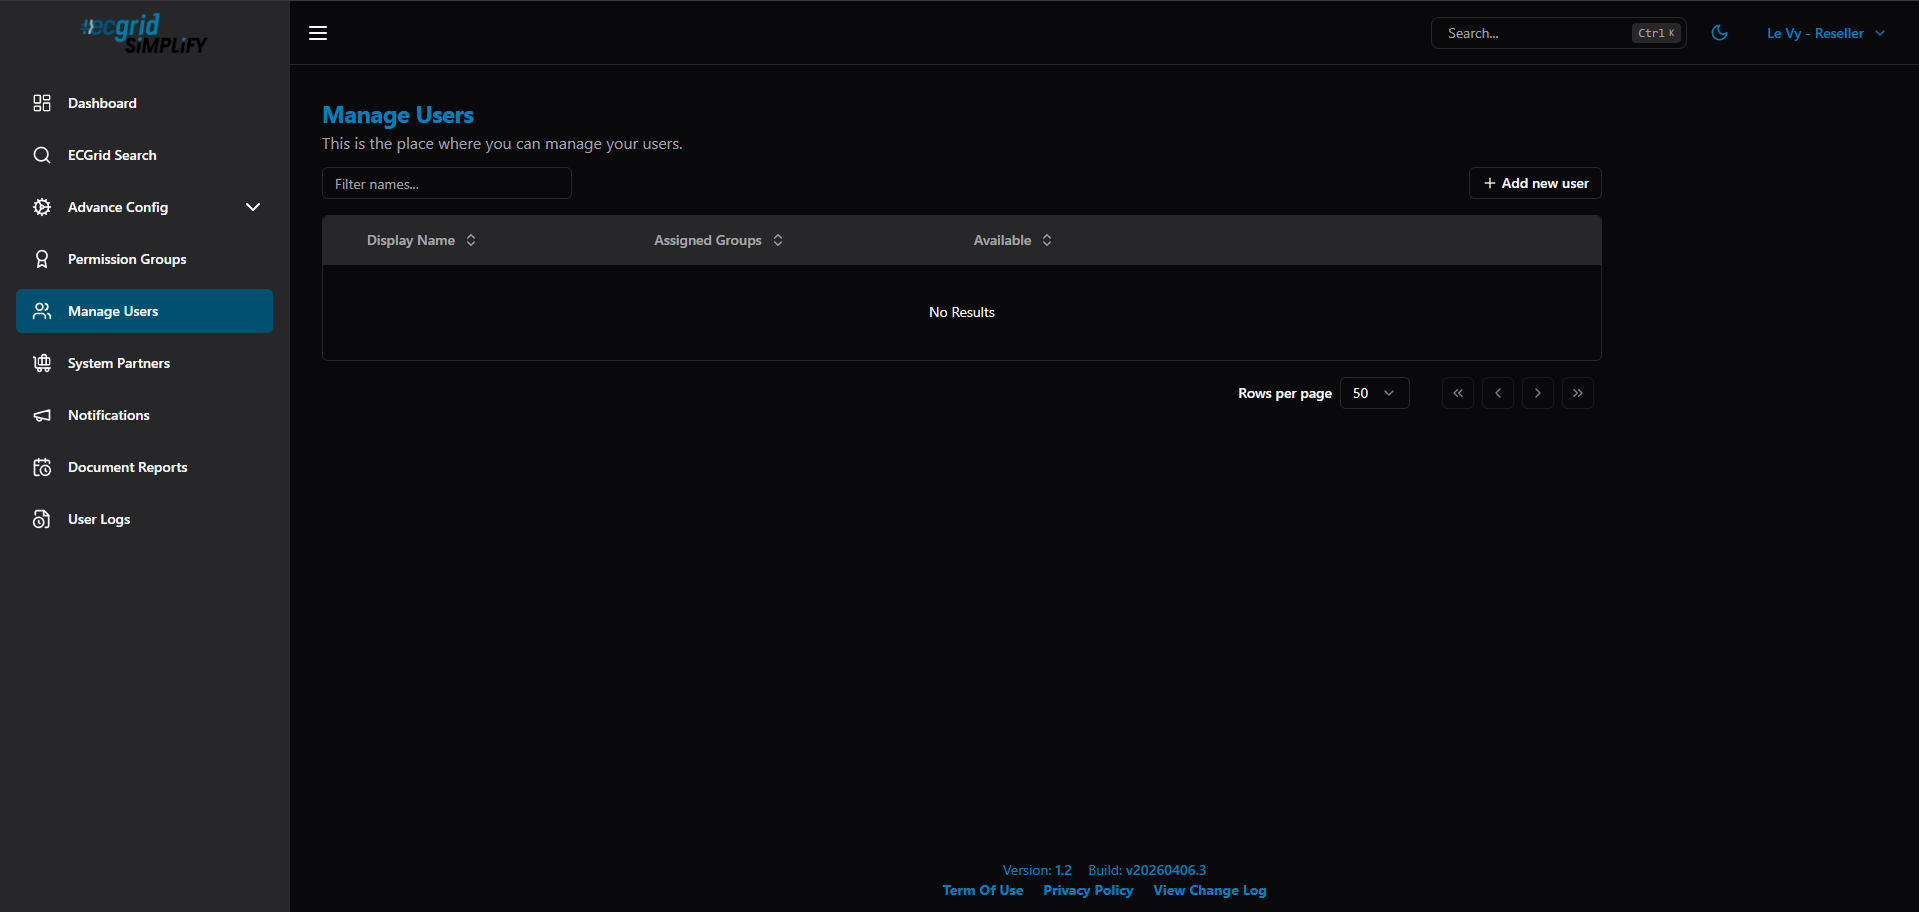
- How to add the sub-reseller.
- To add the sub-reseller: Click Add new user button.
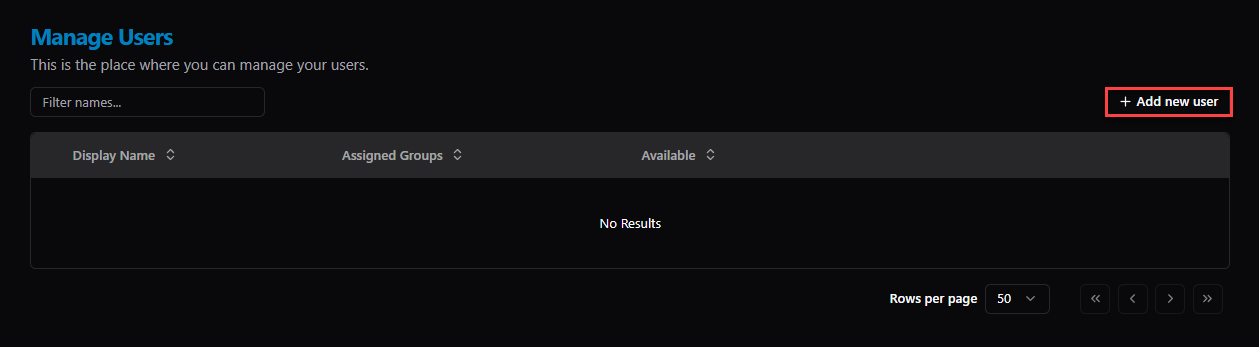
- When creating a new user or team, a form will appear prompting you to enter their details. Fields marked with a red asterisk (*) are mandatory
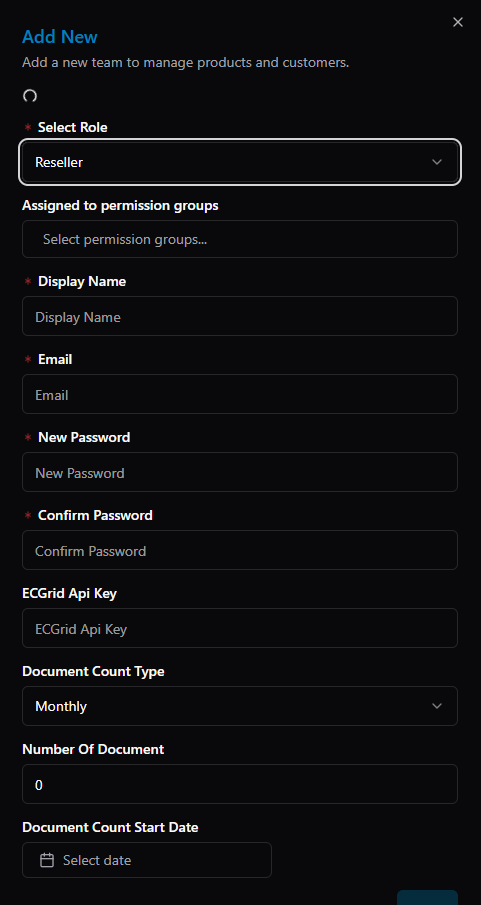
- Select Role (*): Choose the account type for the new user from the dropdown menu (e.g., Reseller or Customer). This determines their baseline access level in the system.
- Assigned to permission groups: (Optional) Select specific permission groups to grant the user customized access rights beyond their default role.
- Display Name (*): Enter the name of the user, team, or company. This name will be displayed throughout the Simplify dashboard.
- Email (*): Provide a valid email address. This will be used as the user’s login ID and for system notifications.
- New Password (*): Create a secure password for the new account.
- Confirm Password (*): Re-enter the password exactly as typed above to verify it.
- ECGrid Api Key: (Optional) Input the specific ECGrid API key if this user needs direct integration with ECGrid services.
- Document Count Type: Select the tracking period for document limits (e.g., Monthly).
- Number Of Document: Specify the maximum number of documents this user is allowed to process within the chosen period. Enter 0 for unlimited, or set a specific quota.
- Document Count Start Date: Use the date picker to select the exact date when the document quota cycle begins.
- Once created, the new Reseller account will immediately appear in the list and is set to Available by default.
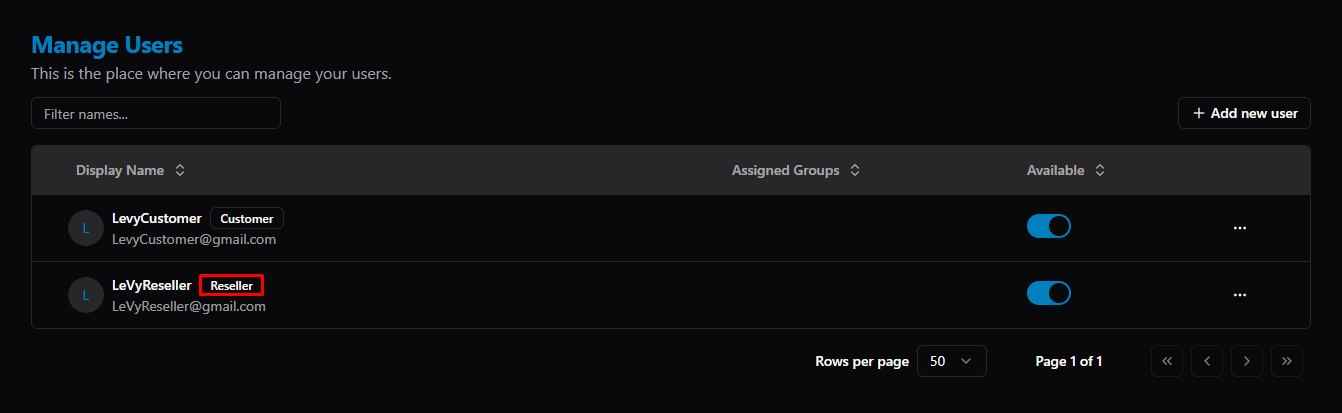 Click the action menu (...) next to the Reseller account to access the following management options: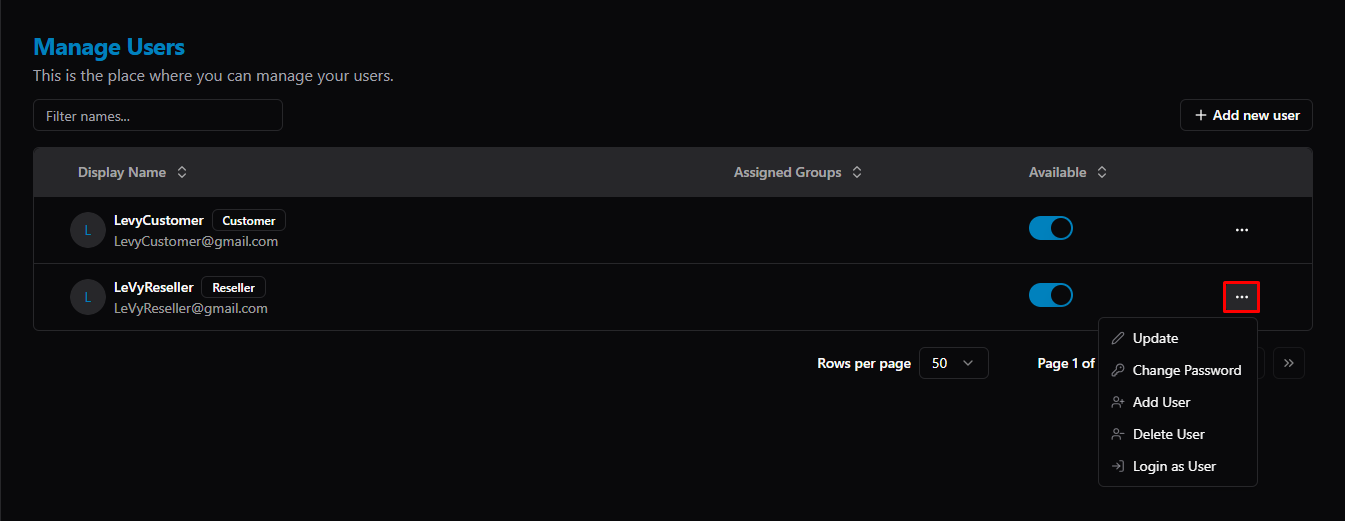
- Update: Modify the account's details, including permission groups, display name, email, and ECGrid API Key.
- Change Password: Reset the user's login credentials by entering and confirming a New Password, then clicking Save.
- Add User: Create a new sub-account (or sub-customer) directly under this Reseller.
- Delete User: Permanently remove this account from the system.
- Login as User: Impersonate and log into the system as this Reseller to view their dashboard or troubleshoot settings.
- To add the sub-reseller: Click Add new user button.
- How to add the sub-customer.
- To create a Customer, follow the same process from Step A to Step B as you did for the Reseller. However, in the Select Role dropdown, choose Customer instead of Reseller.
- Once created, the new Customer account will immediately appear in the list and is set to Available by default.
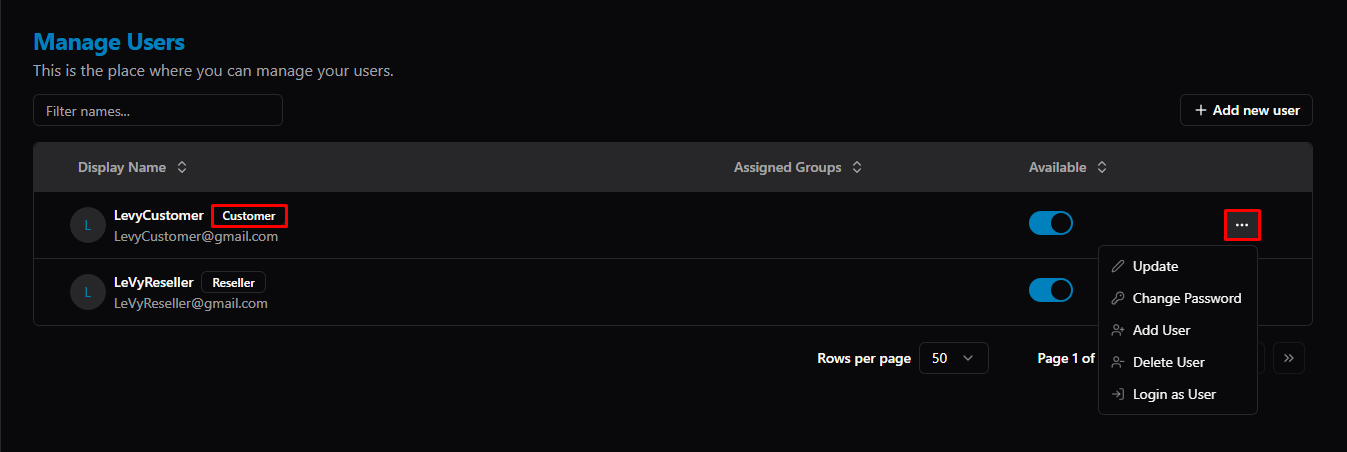
Click the action menu (...) next to the Reseller account to access the following management options: The management options for a Customer account are identical to those of a Reseller. However, when using the Add User function, the configuration form will not ask for Document Count limits. You only need to provide the standard account details and click Save.
Was this article helpful?
That’s Great!
Thank you for your feedback
Sorry! We couldn't be helpful
Thank you for your feedback
Feedback sent
We appreciate your effort and will try to fix the article