Use this article when you choose Authorization Type: Website Authorization in Simplify. Website Authorization uses the public ECGrid TaaS app from the Amazon Selling Partner Appstore, which can be used by multiple stores. You approve the app in Amazon, and there are no keys to copy.
The public app requests access to Personally Identifiable Information (PII), such as buyer and shipping details in orders, under the Direct-to-Consumer Shipping permission.
If you use your own private app instead, see How to set up connectivity between Simplify and Amazon Seller Central using Self Authorization (private app). [ADD LINK TO THE SELF AUTHORIZATION ARTICLE]
Amazon Vendor Central is a separate connector and is not covered here. The ECGrid TaaS app currently supports Amazon Seller Central only.
Before you start
Get the ECGrid TaaS app from the Amazon Selling Partner Appstore first: ECGrid TaaS - Amazon Selling Partner Appstore. [ADD LISTING LINK] Then set up the connection in Simplify as below.
Have your Seller Central URL (for example https://abcxyz.amazon.com) and your Region: na (North America), eu (Europe) or fe (Far East).
Steps
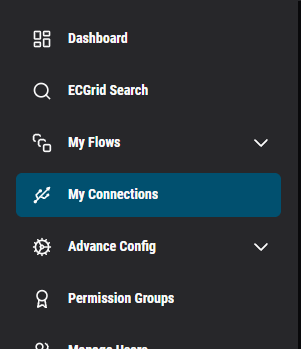
In Simplify, open My Connections on the left menu.
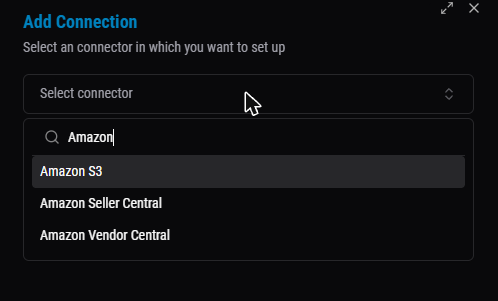
Click Add Connection.

In Select connector, choose Amazon Seller Central.
Enter the following:
- Connection Name: a name for this connection.
- Region:
na,euorfe. - Authorization Type: Website Authorization (default).
- Seller Central URL: for example
https://abcxyz.amazon.com. 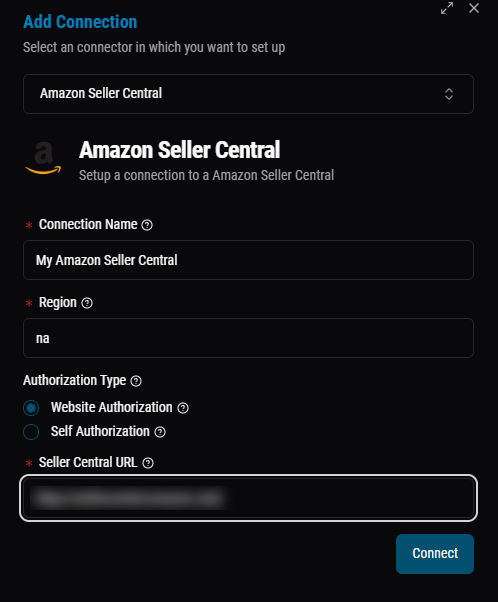
Click Connect. A window from Amazon opens where you authorize ECGrid TaaS. Complete the authorization there.
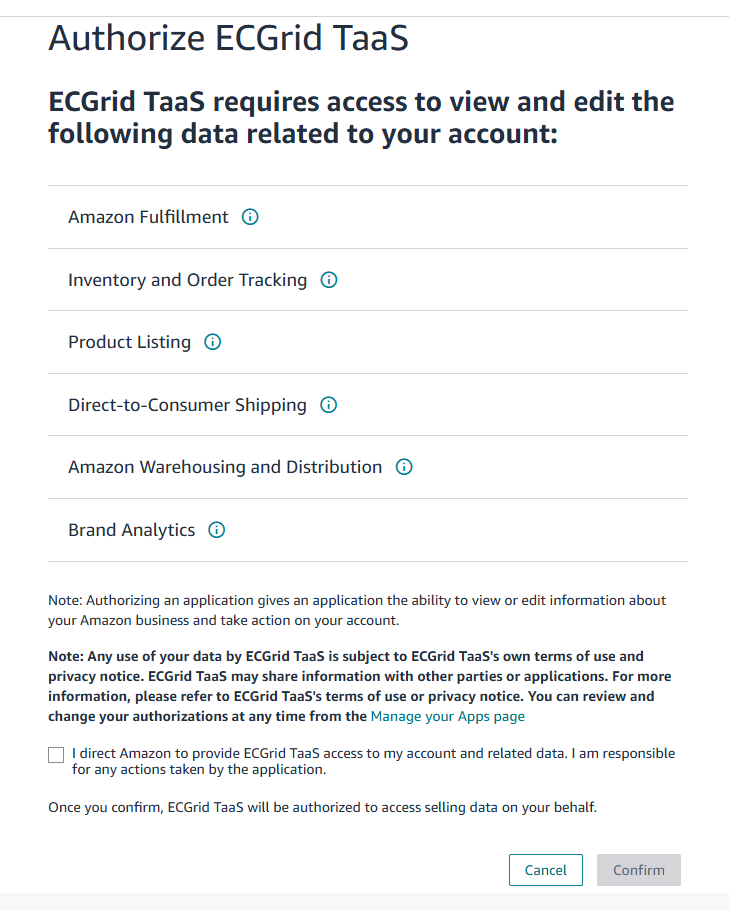
After the authorization, Simplify saves the connection automatically and closes the panel. You do not need to click Save. The connection appears in My Connections with Status Connected (green).
If you click Cancel in the Amazon window, the connection is not authorized and its Status shows Failed (red) instead of Connected (green). To fix it, use Reconnect (see below) and complete the authorization.
Refresh the connection status
The round arrow icon next to Status (top right of the connection panel) only refreshes the status; it does not authorize anything.
- If you finished the authorization in Amazon while the connection panel is still open and the Status has not changed, click the refresh icon to see the new status.
- If you closed Simplify, you do not need to do anything. When you open Simplify again, the status is updated automatically.
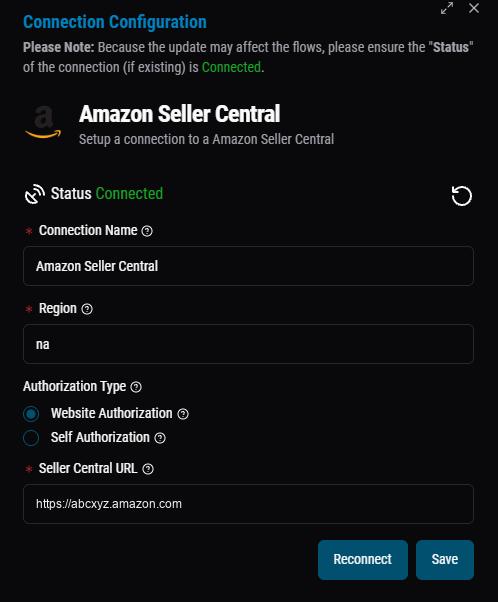
Reconnect an existing connection
- In My Connections, click ... on the Amazon Seller Central connection and choose Config.
- Check Status. It should be Connected (green). Failed (red) means the authorization was cancelled or did not complete. The panel warns that updating a connection may affect your flows.
- Click Reconnect to authorize again. Do not click Save unless you changed a field.
Was this article helpful?
That’s Great!
Thank you for your feedback
Sorry! We couldn't be helpful
Thank you for your feedback
Feedback sent
We appreciate your effort and will try to fix the article
