A Document Type tells Simplify how to read or write a file: its format (CSV/delimited, fixed-width, XML, JSON, X12, EDIFACT...) and its structure (records, loops and fields). You need one for every file layout you want to use as the source or destination of a map, for example a flat file your trading partner or your ERP requires.
The Document Type Wizard uses AI to build the structure for you from a specification and/or a sample file, so you don't have to define every field by hand.
Important: Document Types (and maps) can only be created at the reseller account level. They cannot be created from a customer account. Once created on the reseller account, they are available to all customer accounts under that reseller.
Before you start
- Log in to your reseller account in Simplify.
- Have a specification of the file ready (field list, positions/lengths for fixed-width files, data types, required fields). A text, Word, PDF or Excel spec works.
- Have a real sample file if you can. It helps the AI confirm delimiters and formatting.
Step 1 - Open the wizard
Go to Advance Config > Document Types and click Document Type Wizard (top right of the list).
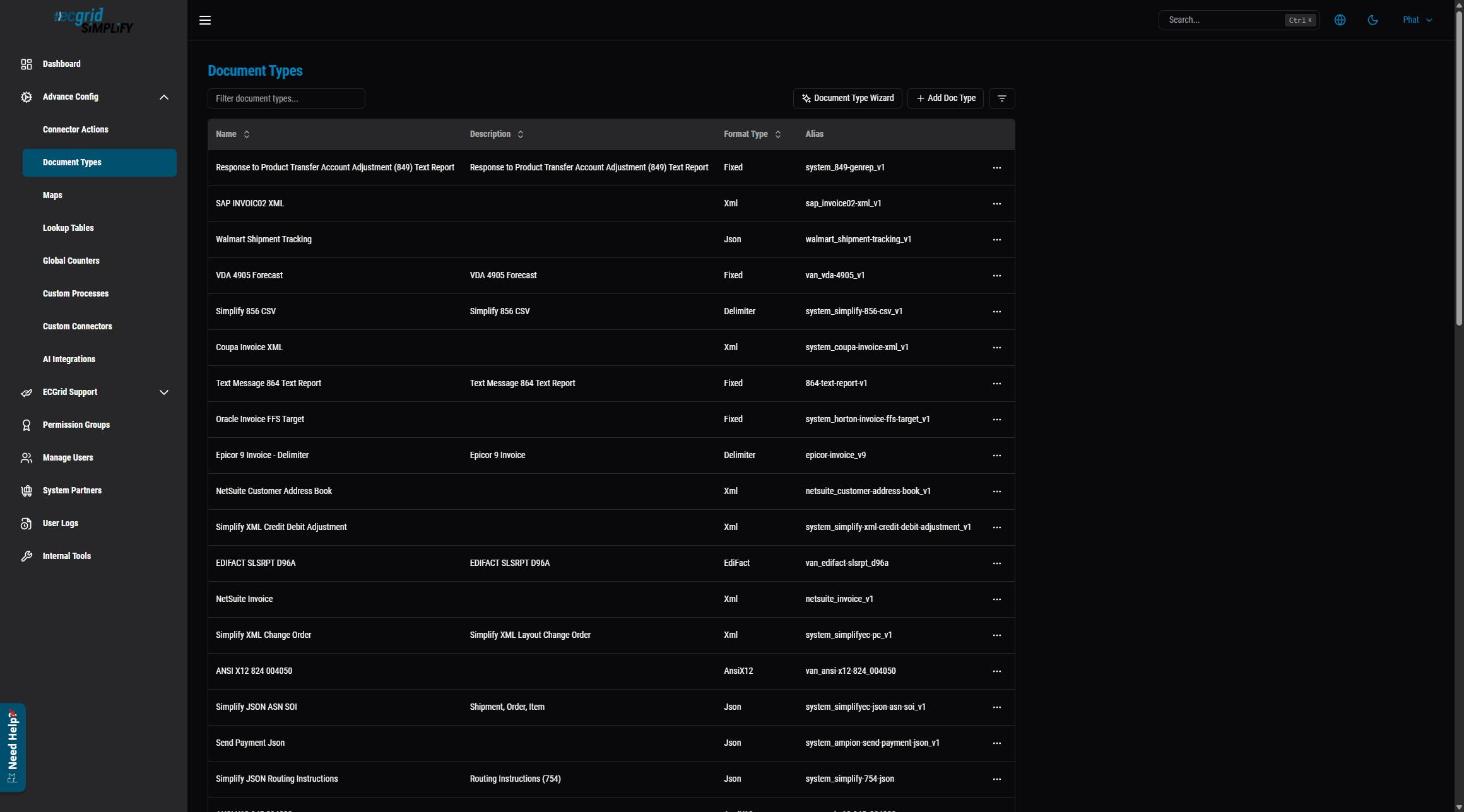
Tip: Add Doc Type creates an empty document type that you build manually. The wizard is the faster option for most files.
Step 2 - Metadata (name, alias, format)
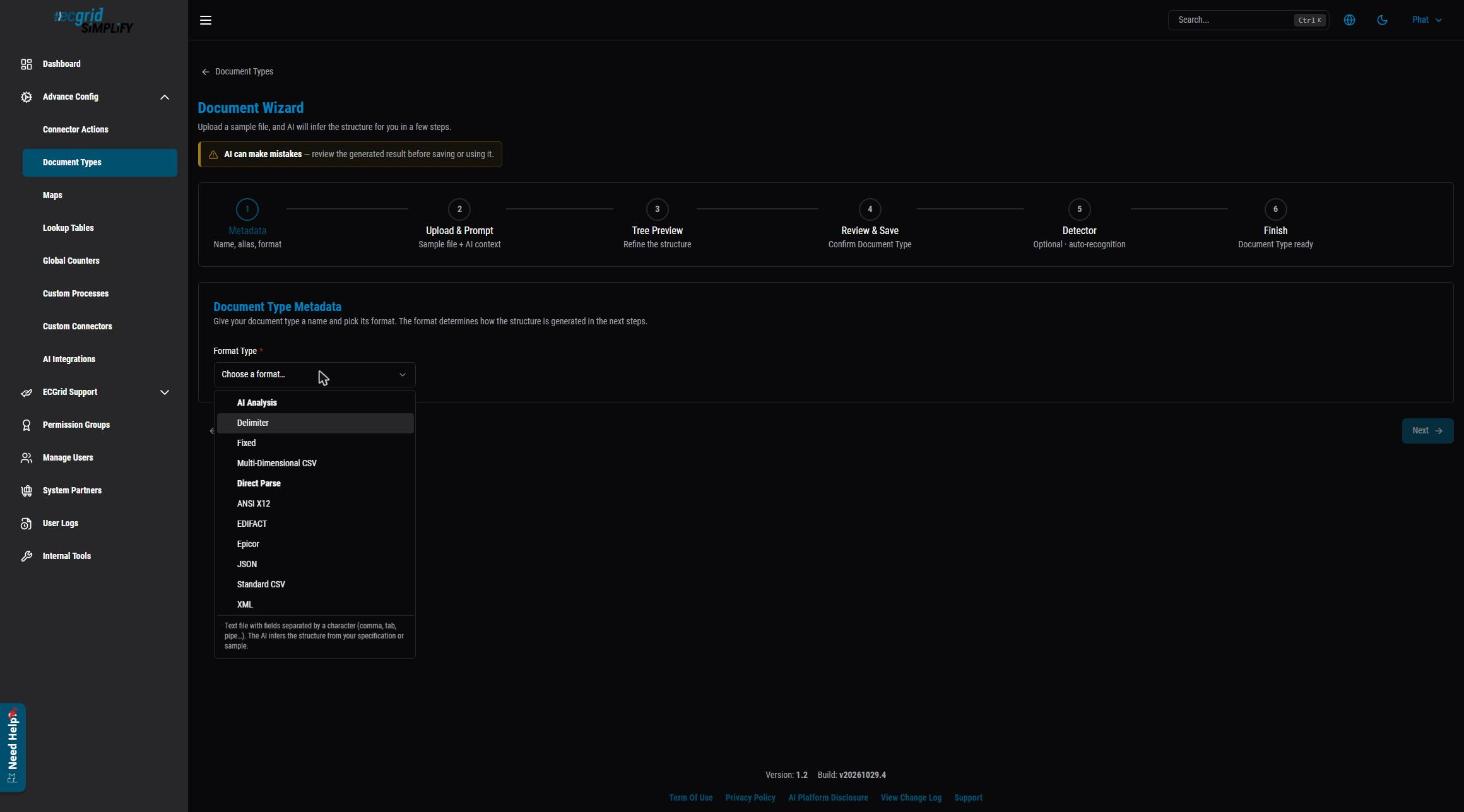
- Choose the Format Type.
- AI Analysis formats (Delimiter, Fixed, Multi-Dimensional CSV): the AI infers the structure from your spec and sample.
- Direct Parse formats (ANSI X12, EDIFACT, Epicor, JSON, Standard CSV, XML): the structure is read directly from the file or schema.
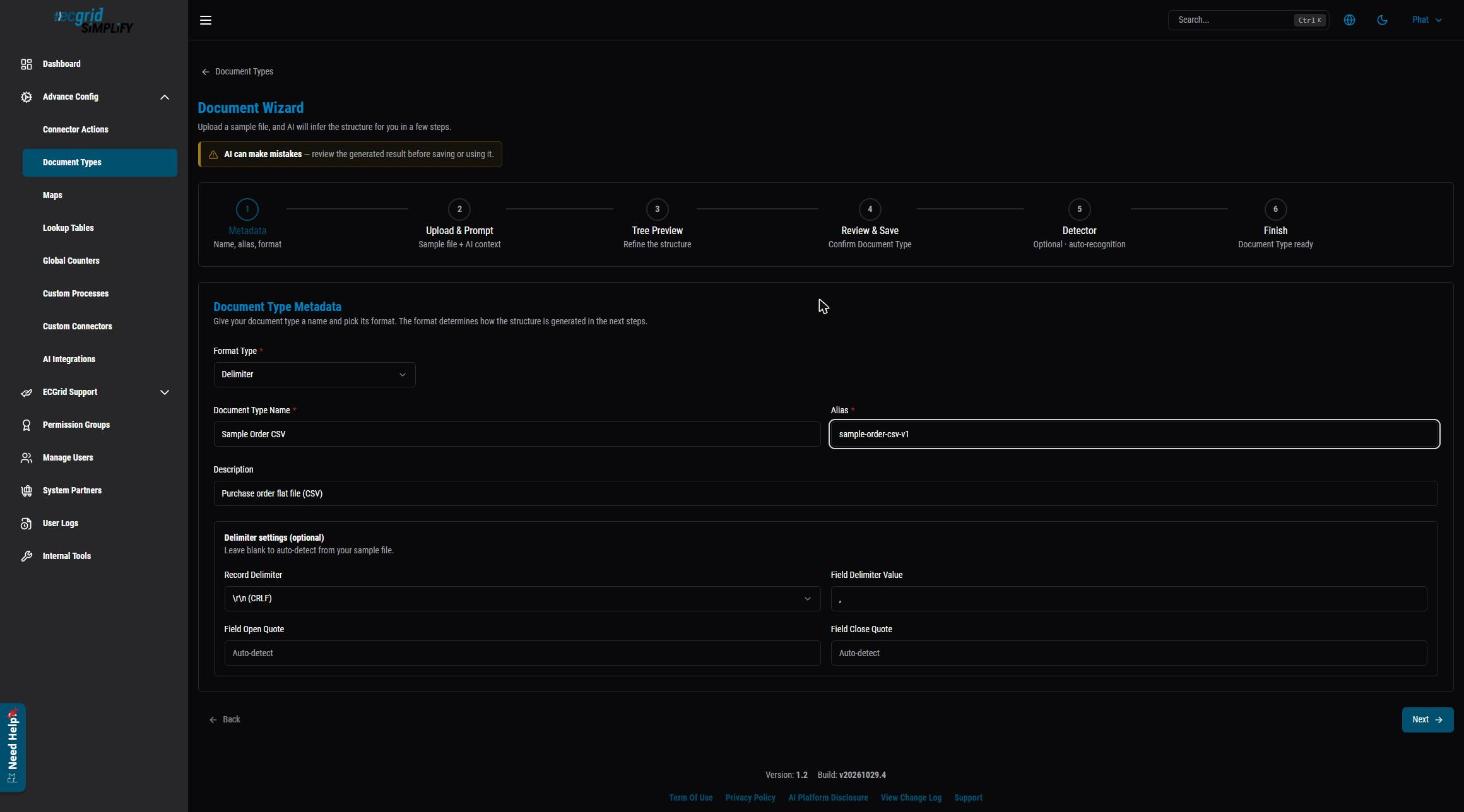
- Enter a Document Type Name. The Alias is filled in automatically from the name; you can change it. The alias must be unique.
- Add an optional Description.
- For Delimiter files, you can set the record delimiter, field delimiter and quote characters, or leave them on Auto-detect.
- Click Next.
Step 3 - Upload & Prompt
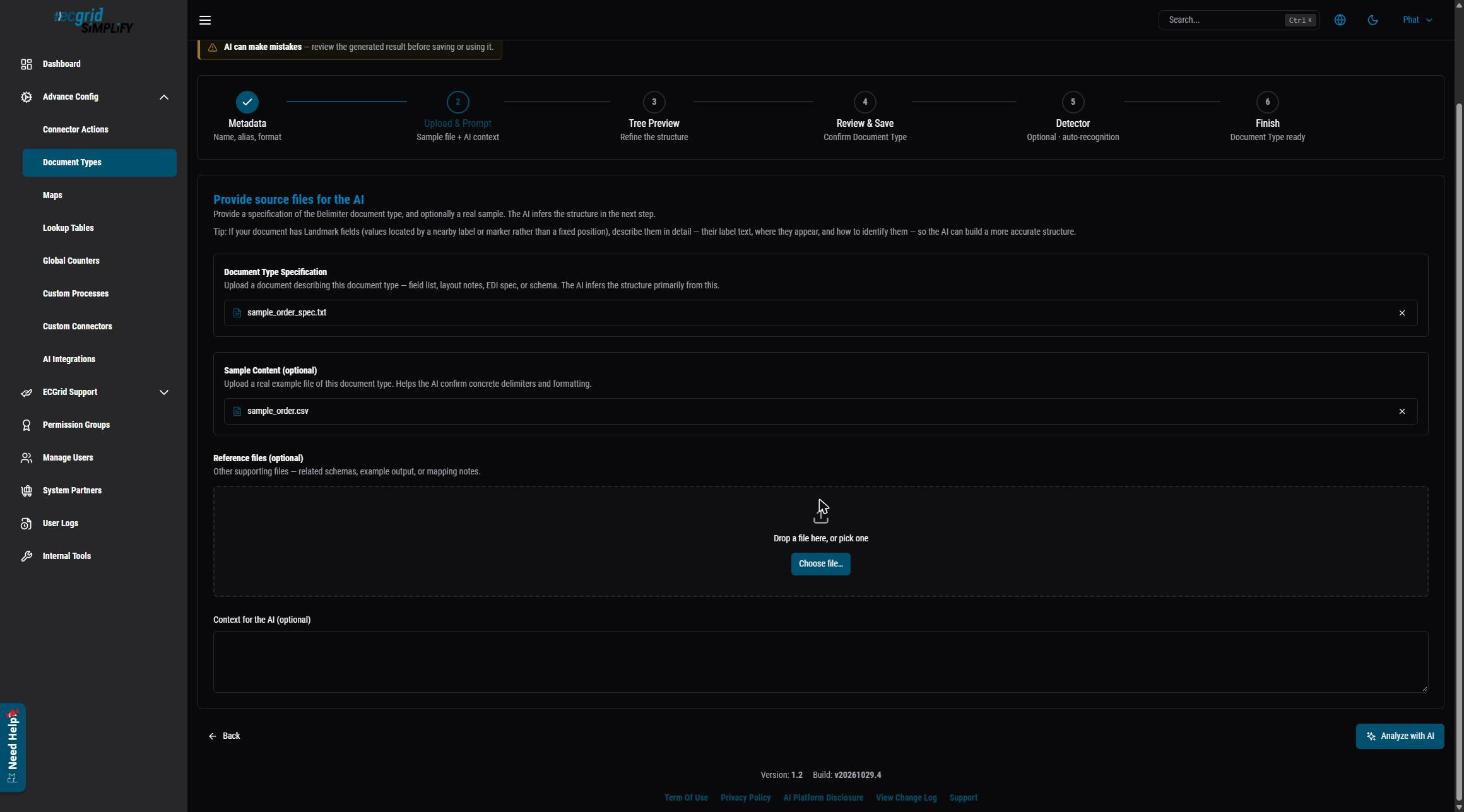
- Document Type Specification: upload the document that describes the file. The AI builds the structure mainly from this.
- Sample Content (optional): upload a real example file. For Delimiter files, upload a sample or enter the Field Delimiter in Step 2 so the delimiter can be detected.
- Reference files (optional): related schemas, example output or mapping notes.
- Context for the AI (optional): describe anything the spec doesn't make clear, for example which fields repeat per line, or "landmark" fields that are found by a label rather than a fixed position.
- Click Analyze with AI. This can take a minute or more for large files. Keep the tab open.
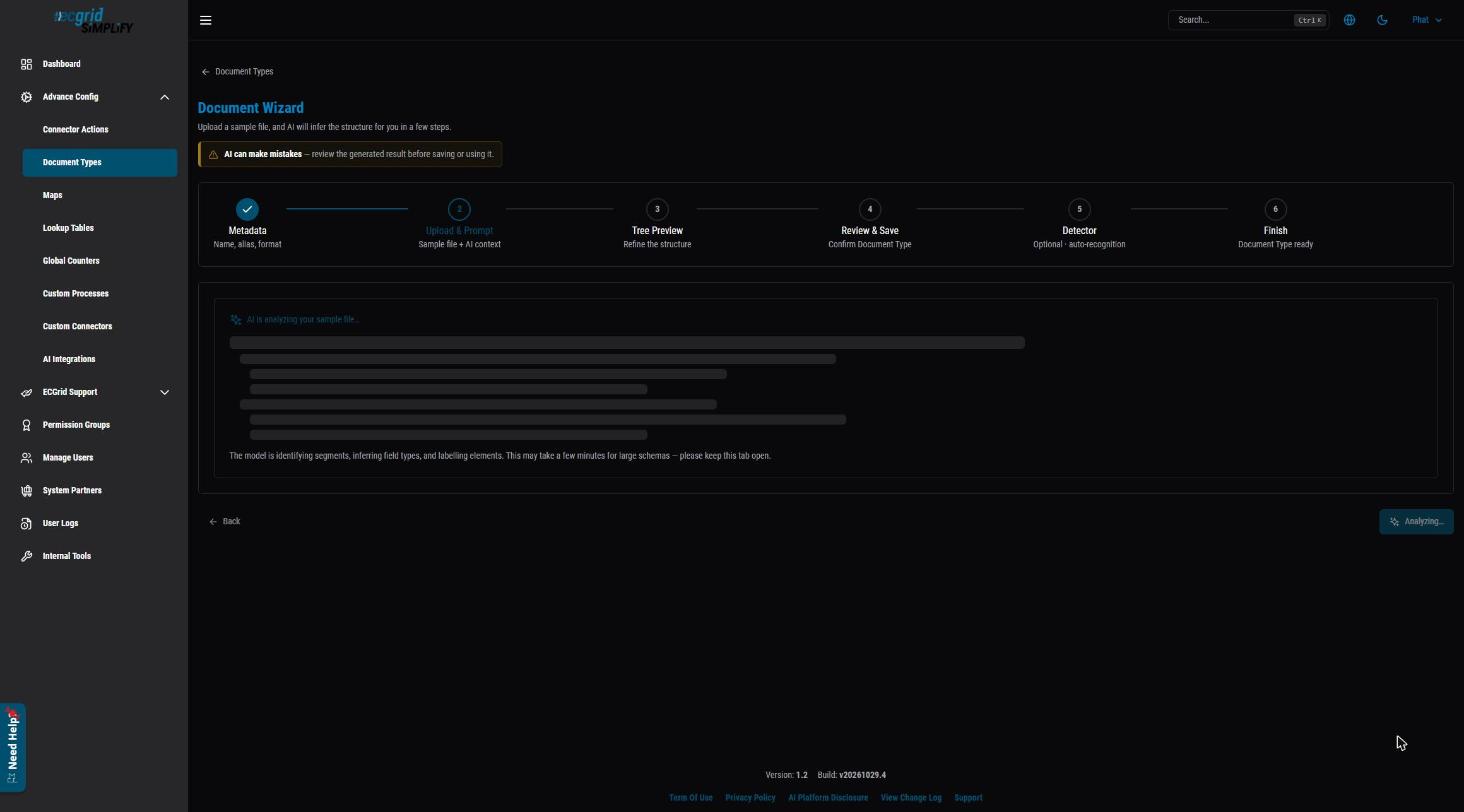
Step 4 - Tree Preview (review the structure)
The AI shows the structure it inferred, with the total number of fields, loop segments and leaf fields. Expand each node and check it against your spec.
- Hover a row and click ... to Edit Element (rename, change properties) or Delete it.
- If the result is far off, improve the spec or the context and click Regenerate with AI.
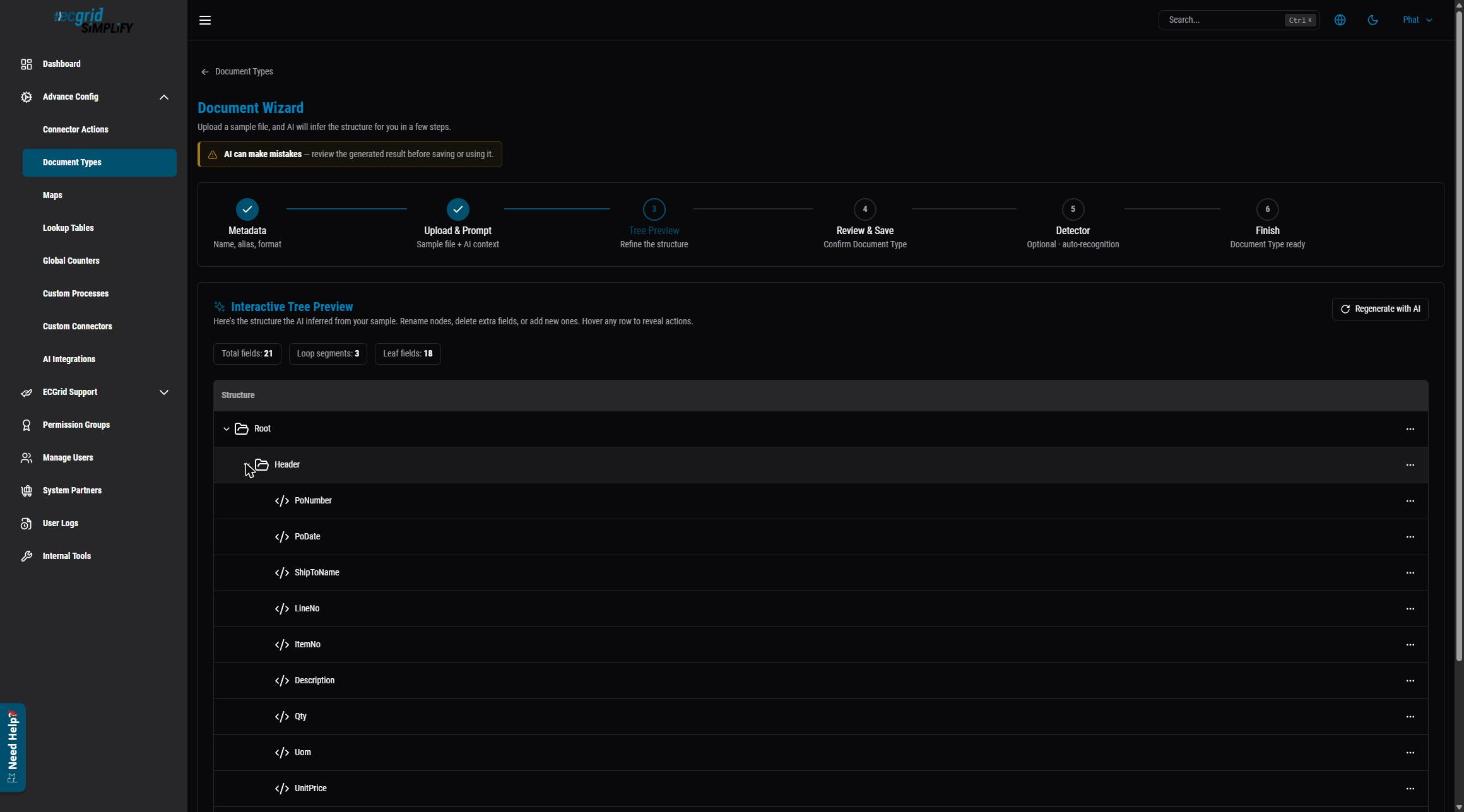
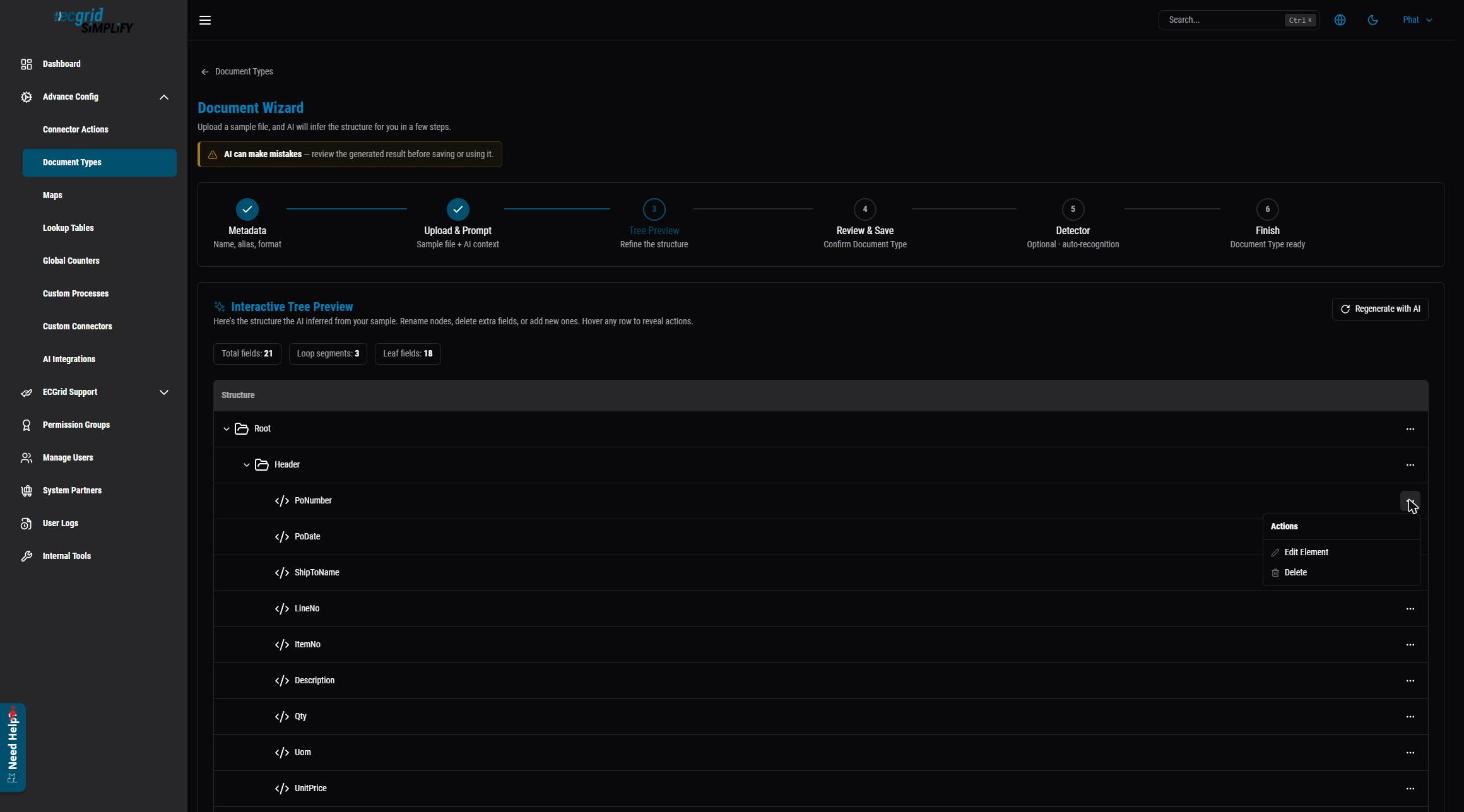
Always review this step. AI can make mistakes. For example, on a CSV where each line repeats the order header, the AI may place the same fields under both Header and Detail. Remove the fields that don't belong so the structure matches how you want to map the file.
Click Next.
Step 5 - Review & Save
Check the summary (name, alias, format, files used, field counts, delimiters) and the read-only structure preview. Click Back if anything needs to change, otherwise click Save Document Type.
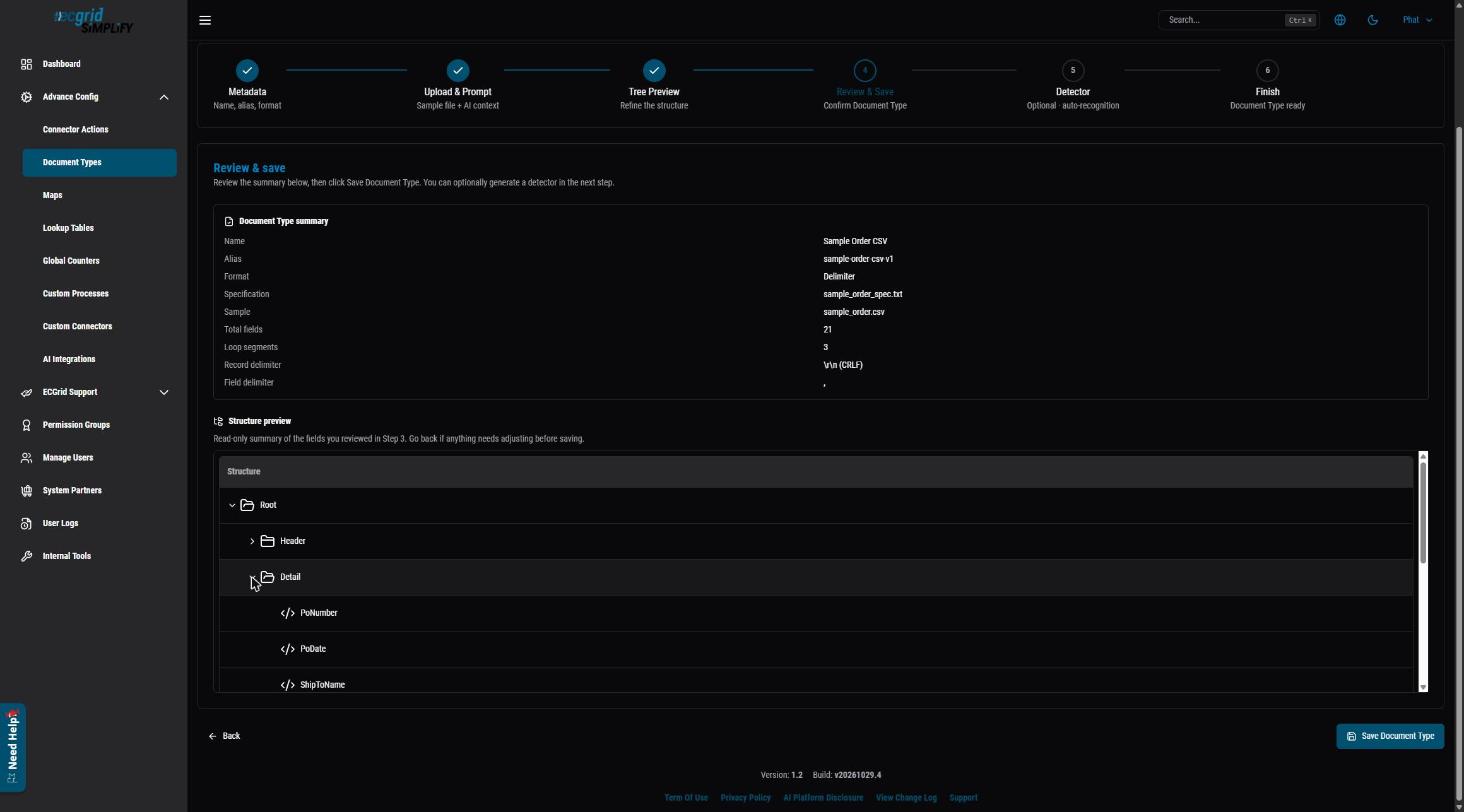
Step 6 - Detector (optional) and Finish
After saving, you can optionally generate a Detector so Simplify can automatically recognize incoming files of this type. See What is a Document Detector and How to Setup the Proper Document Detector. Then click through to Finish. The new document type appears in Advance Config > Document Types.
After you create the document type
Depending on how the document type will be used, complete these settings on it (Advance Config > Document Types > ... > Config):
- Detector - required if the document type is an input. If Simplify will receive files of this type (for example from an SFTP, VAN or Windows Service connection), add a detector on the Detector tab so Simplify can recognize the file and process it with this document type. See What is a Document Detector and How to Setup the Proper Document Detector.
- Partner XPath and Integration Keys - required when you exchange this document with a trading partner. Set the Partner XPath on the field that identifies the partner, then enter the matching Integration Key on the trading partner. See What is a Trading Partner xpath, What is an Integration Key and Setting up Trading Partner Integration Keys and Configurations.
- Extract Value XPaths - recommended. Mark the fields your users search for (PO number, invoice number, ASN number, etc.) so their values appear as Identifiers in Histories and documents are easy to find. See How to Set an Extract Value XPath.
Next steps
- Open the document type (... > Config > Structure) to fine-tune it. See What is a Document Structure.
- Create a map that uses it as the source or destination: Basics of How to Map, How to Copy a Map, Reseller Map Walk Through.
- Use it in a flow: Setup a Basic Flow.
Was this article helpful?
That’s Great!
Thank you for your feedback
Sorry! We couldn't be helpful
Thank you for your feedback
Feedback sent
We appreciate your effort and will try to fix the article